Backup and Restore
Data loss can happen for numerous reasons - hardware failures, accidental deletions, cyberattacks, or even natural disasters. For self-hosted applications like HomeVault that store your important personal data, implementing a robust backup strategy is not just recommended—it's essential.
HomeVault provides a comprehensive backup solution that:
- Creates fully-encrypted backups of your server
- Supports multiple cloud storage providers (Backblaze B2, iDrive e2, Wasabi, AWS S3, and any other provider supported by restic)
- Allows both on-demand and scheduled backups
- Simplifies disaster recovery through a streamlined restore process
The snapshot created during a backup does not have an entire image of your server. Instead, the following information gets backed up:
- App configuration data
- User-generated content
- Database files
- Module configurations
In case of a catastrophic loss of your server, the information in a backup snapshot has all the information required to recover the applications, configuration and user data that was on your server at the time the snapshot was taken.
[!info] It is recommended to use HomeVault's WebUI console to configure the backup system. However, you can also perform the operations described below using HomeVault's setup script directly. By default, after installing the WebUI console, the script should be available under: ~/homevault/workspaceInitializing the Backup System
Before creating your first backup, you need to initialize the backup system with your cloud storage provider credentials. This can be done from the Repository Configuration page of the WebUI console:
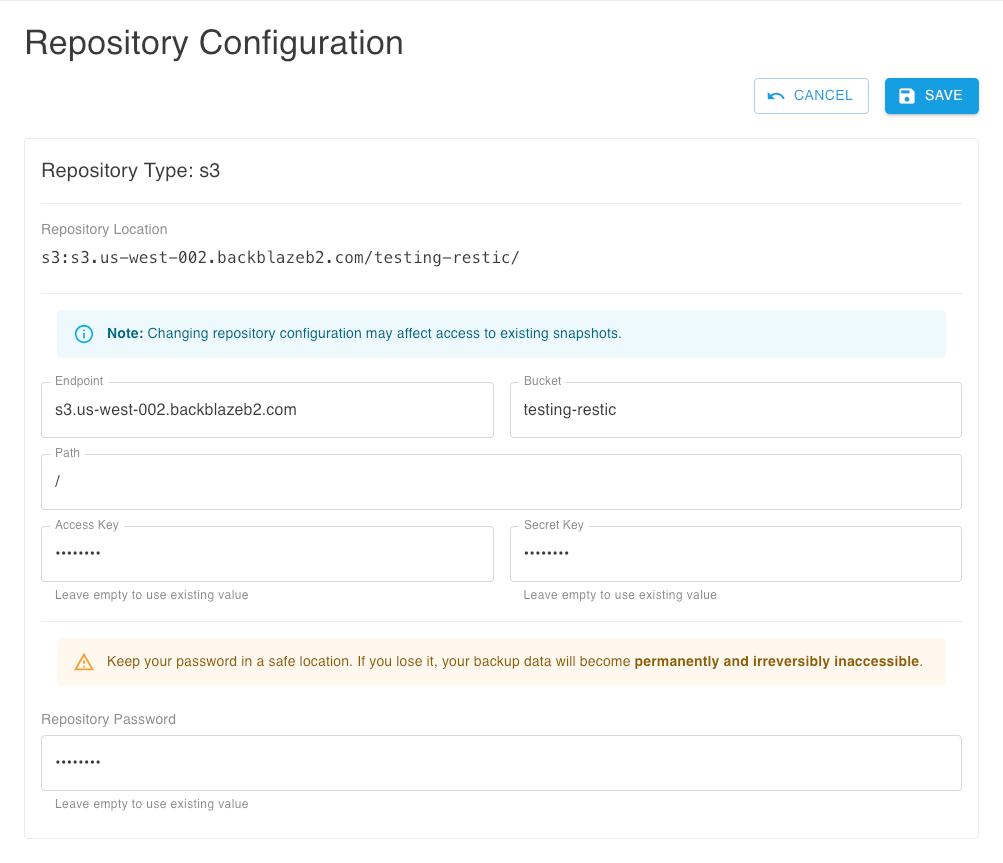
[!info] HomeVault uses restic to perform backups of application and user data in your server. You can check out more information on how to configure a repository in restic's online documentation.
[!tip] Make sure to store your Repository Password in a safe location. If you lose it, your backup data will become permanently and irreversibly inaccessible.
Creating On-Demand Backups
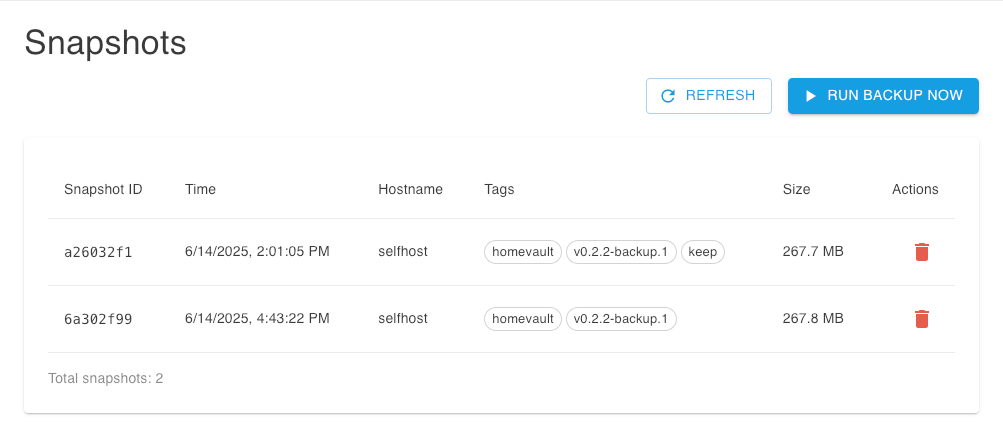
To create a backup of your server on demand, you can use the Snapshots page of the WebUI Console, using the Run Backup Now button at the top of the page:
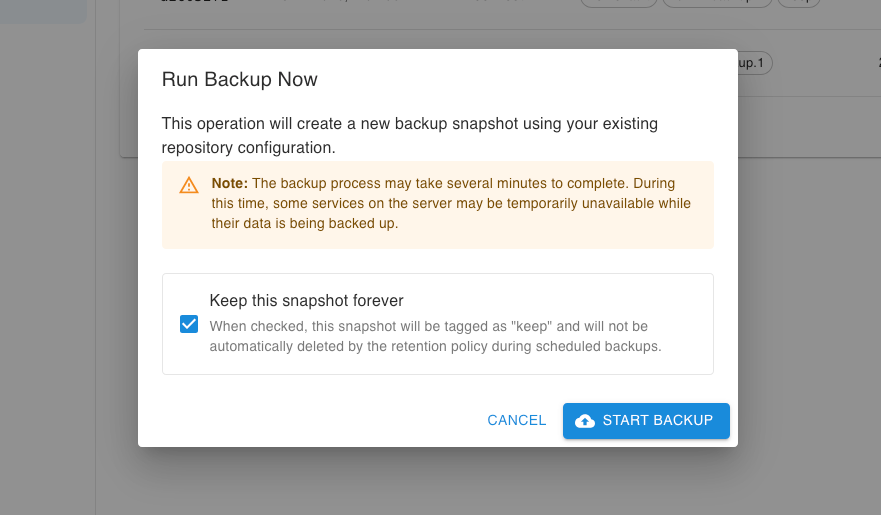
If you have scheduled automated backups and enabled a retention policy, you can create on-demand backups and mark them for long-term retention, by enabling the appropraite option in the confirmation dialog:
Automated Backups
HomeVault allows you to schedule regular backups to run automatically in the background. By default, regular backups are disabled after the initial server deployment. You can configure automated backups from the Scheduling section of the WebUI console:
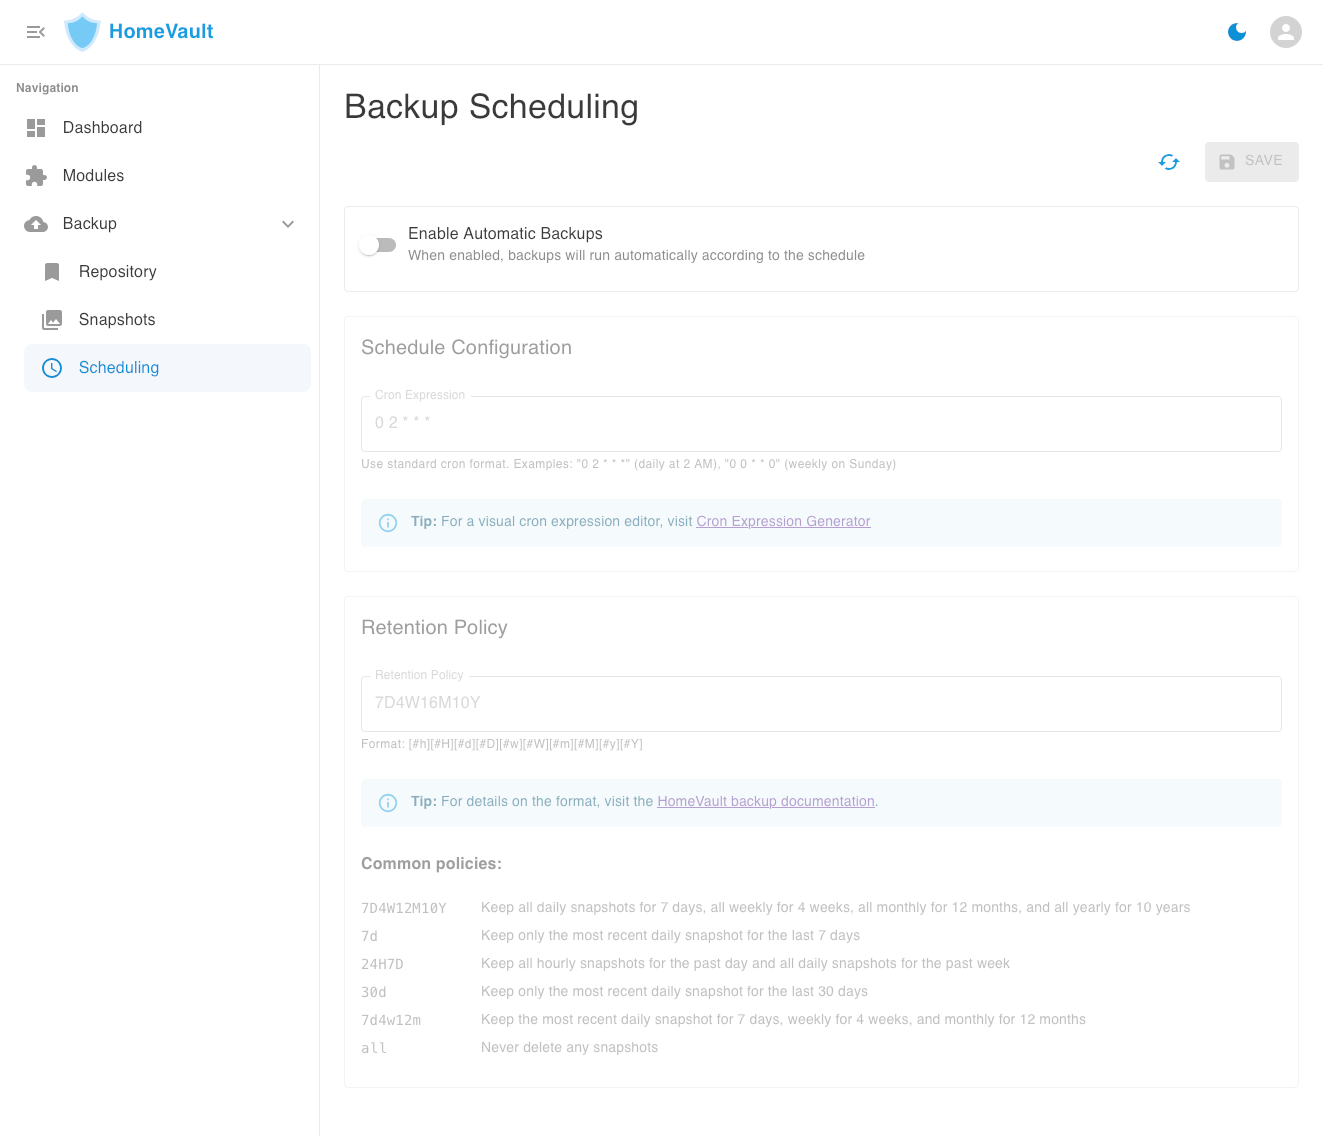
Configuring the backup schedule
You can change the schedule at which automated backups take place. By default, automated backups happen daily at 2:00AM. To provide use a different cadence, you need to provide the schedule a cron expression. You can use an online cron expression generator tool to create a cron expression from human language.
Here's a few common example expressions:
0 2 * * *: Every day at 2:00 AM0 0 * * 0: Every Sunday at midnight0 0 1 * *: First day of each month at midnight
Configuring Retention Policy
The backup system will prune older snapshots after each automated backup operation. You can control the amount of cloud storage used for backups by specifying how long backup snapshots should be kept.
The retention policy format uses a combination of time units:
| Unit | Meaning |
|---|---|
| #h | Keep only the most recent hourly snapshot for the last # hours |
| #d | Keep only the most recent daily snapshot for the last # days |
| #w | Keep only the most recent weekly snapshot for the last # weeks |
| #m | Keep only the most recent monthly snapshot for the last # months |
| #y | Keep only the most recent yearly snapshot for the last # years |
| #H | Keep all hourly snapshots for the past # hours |
| #D | Keep all daily snapshots for the past # days |
| #W | Keep all weekly snapshots for the past # weeks |
| #M | Keep all monthly snapshots for the past # months |
| #Y | Keep all yearly snapshots for the past # years |
Examples:
7D4W16M10Y: Keep all daily snapshots for the past week, all weekly for the past month, all monthly for 16 months, and all yearly for 10 years24H7D: Keep all hourly snapshots for the past day and all daily snapshots for the past week7d: Keep only the most recent daily snapshot for the last weekall: Keep all snapshots indefinitely
Restoring from Backup
One of HomeVault's key advantages is its repeatable deployment architecture, which significantly simplifies the recovery process. When disaster strikes, whether it's a disk failure or a complete server loss, you can recover your entire HomeVault instance with minimal effort.
Restore From Snapshot
To restore your HomeVault instance from a backup, you need to have a server with enough storage capacity to hold the entire data that's included in the backup snapshot.
Step 1. Assuming the workspace you used for the original deployment no longer exists, you will need to recreate the workspace:
mkdir -p ~/homevault/workspace
cd ~/homevault/workspace
curl -fsSL https://github.com/thedebuggedlife/homevault-deployment/releases/latest/download/setup.zip | busybox unzip -n -
chmod +x hv
Step 2. You will need to re-create the restic.env file that was used when you initialized the backup system.
Step 3. Run the restore command:
./hv restore --snapshot <snapshot_id> --restic-env /path/to/your/restic-env-file[!tip] If you don't specify a snapshot ID, the script will automatically use the latest available snapshot
To perform a dry run without actually restoring:
./homevault.sh restore --snapshot --restic-env /path/to/your/restic-env-file --dry-runWhat Gets Restored From A Snapshot
During the restore process, HomeVault:
- Downloads the selected snapshot from your cloud storage provider
- Extracts app configuration and user data from the snapshot
- Redeploys the modules that were active when the snapshot was created
- Restores your data to its previous state
The only requirement is to have sufficient storage space on your server to accommodate the snapshot contents.
Encryption and Security
HomeVault's backup solution leverages restic's robust encryption model to ensure your data remains protected at all times. Every snapshot is encrypted using the password you provide during initialization (the RESTIC_PASSWORD value). This encryption happens client-side before any data leaves your server, meaning your unencrypted data never traverses the network or reaches the storage provider.
Even if an unauthorized party were to gain access to your backup repository they would only see encrypted chunks of data that are practically impossible to decrypt without your password. The repository structure, file names, file sizes, and metadata are all encrypted, leaving attackers with no useful information about your data. This zero-knowledge approach means you can safely store backups on any provider without compromising security, as long as you keep your RESTIC_PASSWORD secure.
Remember that this password is the key to all your backups—if it's lost, your backup data becomes permanently and irreversibly inaccessible, and if it's compromised, your backup data could be decrypted by others.