Workshop May-2025
Welcome to the Server Party workshop for May 18th 2025! This document will help you prepare for the workshop. Feel free to come back to this page after the day of the workshop to review any of the details that we covered in person.
Hardware
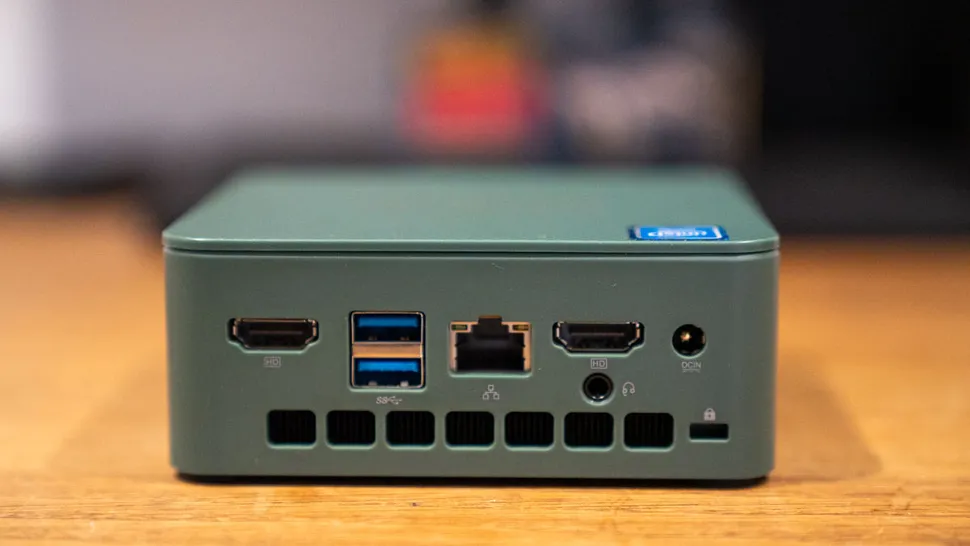
There are 2 types of hardware available for workshop participants. They both have very similar specifications, and come in a tiny footprint. The Dell server offers better performance, at a slightly higher cost. Either type of server is great choice to run all the software available as part of this project.
| Specification | GMTek NucBox G3 | Dell Optiplex 7060 Micro |
|---|---|---|
| CPU | Intel Twin Lake N150 (4-core) | Intel Core i5 8500T (6-core) |
| Graphics | Intel UHD | Intel UHD |
| RAM (installed/max) | 16GB/16GB DDR4 | 16GB/32GB DDR4 |
| Disk (installed) | 2TB WD Green NVMe | 2TB PNY SSD |
| Disk (expansion) | SATA M.2 2242 | SATA M.2 2280 |
| Available units | 5 | 2 |
| Price | $270 | $325 |
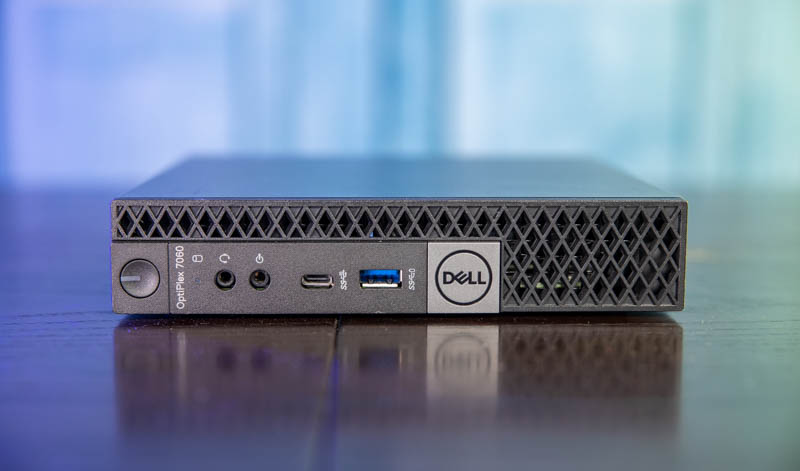
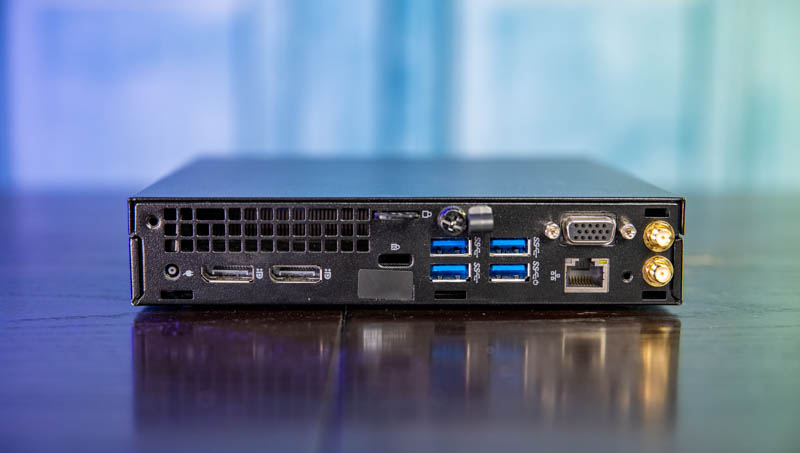
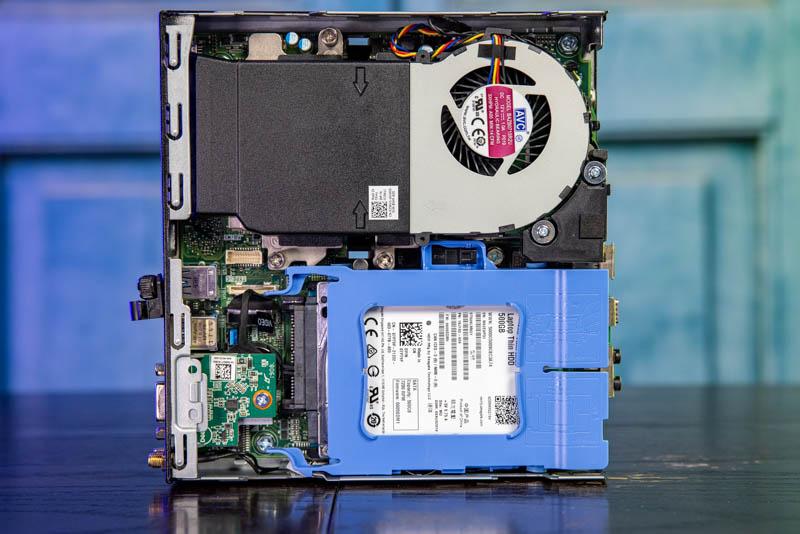
Dell Optiplex 7060 Micro
The Dell OptiPlex 7060 Micro is a compact yet powerful mini PC ideal for self-hosting, featuring 8th generation Intel Core processors (like the i7-8700T with 6 cores/12 threads), support for up to 32GB DDR4 RAM, and excellent storage options including an M.2 NVMe SSD slot and space for a 2.5" SATA drive. Its ultra-small form factor (just over 1.1L in volume) makes it perfect for space-constrained environments, while its energy efficiency (idling at approximately 12-13W for the Micro version) keeps power costs low for 24/7 operation. The system offers robust connectivity with multiple USB ports, dual DisplayPort outputs, and Intel Gigabit Ethernet, plus a tool-less design for easy maintenance and upgrades—making it an excellent, reliable platform for home servers, NAS setups, virtualization with Proxmox, or running multiple self-hosted applications.
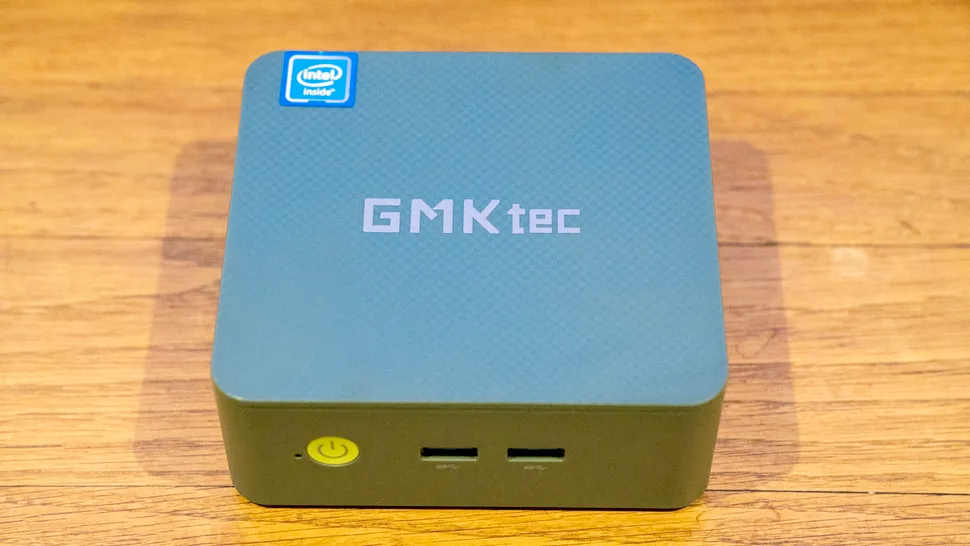
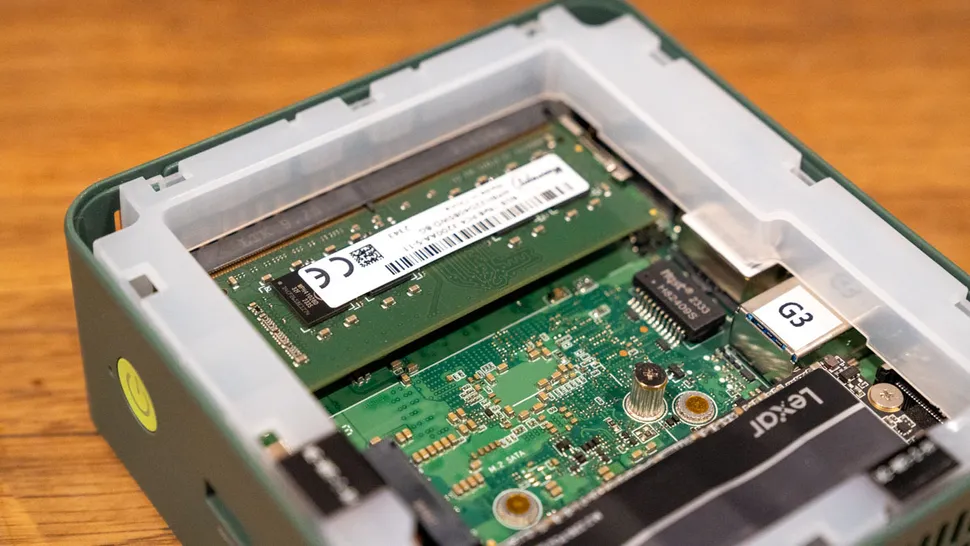
GMTek NucBox G3
The GMKtec NucBox G3 is an ultra-compact yet capable mini PC powered by Intel's 12th Gen Alder Lake N150 processor (4 cores/4 threads, up to 3.4GHz), making it ideal for self-hosting applications while maintaining exceptional energy efficiency. Its remarkably low power consumption (around 12-21 watts under load) makes it perfect for 24/7 operation as a home server, with the N150 being a 6-watt TDP chipset that significantly outperforms older Celeron and Atom processors. It's widely praised for self-hosting applications including Proxmox virtualization, Docker containers, software routers, media servers, and network monitoring—offering an excellent platform for building an affordable, energy-efficient homelab. The NucBox G3 supports up to 16GB DDR4 RAM and comes with an upgradeable NVMe SSD, providing an excellent balance of performance, expandability, and low operating costs for continuous hosting applications.
Workshop Agenda
Build Your Server
[!info] Time estimate: 30 minutes
The first thing that we will do is assemble our server. This will help you become familiar with the process of tinkering with the hardware, in case you ever need to upgrade or replace a component on the server. For example, expanding storage with a new disk.
Once the server is built, we will connect it to power and Ethernet. Now the server is ready to install the operating system.
Install Ubuntu
Next, we will install Ubuntu Server 24.02 on the server. This needs to be performed with a monitor and keyboard physically connected to the server. This means, we will need to do this step one person at a time.
To begin this process, you will need to plug the USB drive with the Ubuntu installer before turning on the server. Once turned on, you will see a text menu. Select the option with the option to "Try or Install Ubuntu Server". Follow the steps on the installation wizard.
[!tip] The following steps need special attention. Stop when you get to these and ask for help if necessary.
Disk Partitioning: Accept the default partitioning scheme. The screen that follows will ask you to confirm the disk partition and volume settings. Before proceeding, you will need to expand the size of the root volume to occupy the entire disk (by default Ubuntu Server sets this volume size to 100GB only).
Administrator Account: This is the account you will use to log in to your server, whether locally (physical monitor and keyboard connection) or remotely (using Termius or SSH). You will only use this account to install the applications on the server. This is not the account that you will use to connect to the applications on the server (like Immich or Nextcloud). I recommend choosing the username installer (all lowercase) to make its purpose explicit. I also recommend choosing a unique password, and not the one you plan to use for your actual user account.