Running HomeSeer on Raspberry Pi
Build your own powerful smart home hub with a tiny footprint. We'll put together a dedicated HomeSeer system using a Raspberry Pi 4.


Running HomeSeer on a dedicated Raspberry Pi 4 ensures a stable and uninterrupted Smart Home experience. Unlike shared servers, where system updates or maintenance can disrupt automation routines, a standalone Raspberry Pi keeps your home automation running smoothly 24/7.
With sufficient processing power for most use cases, the Raspberry Pi 4 can efficiently handle HomeSeer without performance bottlenecks. Its small form factor also makes it easy to discreetly place in a central location, such as near your home router, ensuring optimal network connectivity without clutter. This approach guarantees reliability while keeping your automation independent from other server workloads.
Whether you’re new to HomeSeer or wanting to move your existing installation to a dedicated host, this guide will walk you through the hardware requirements, setup steps, and best practices to get your HomeSeer hub up and running. The total cost of the parts to build the recommended system is about $140US plus the cost of a license for HomeSeer, which you can get at the end of a 30-day trial.
Once we're done following the steps, we will have not only a Smart Home hub, running HomeSeer, but also a fully functional Raspberry Pi 4 server that can be further tweaked and customized as part of our self-hosting toolbox. 🧰
What is HomeSeer?
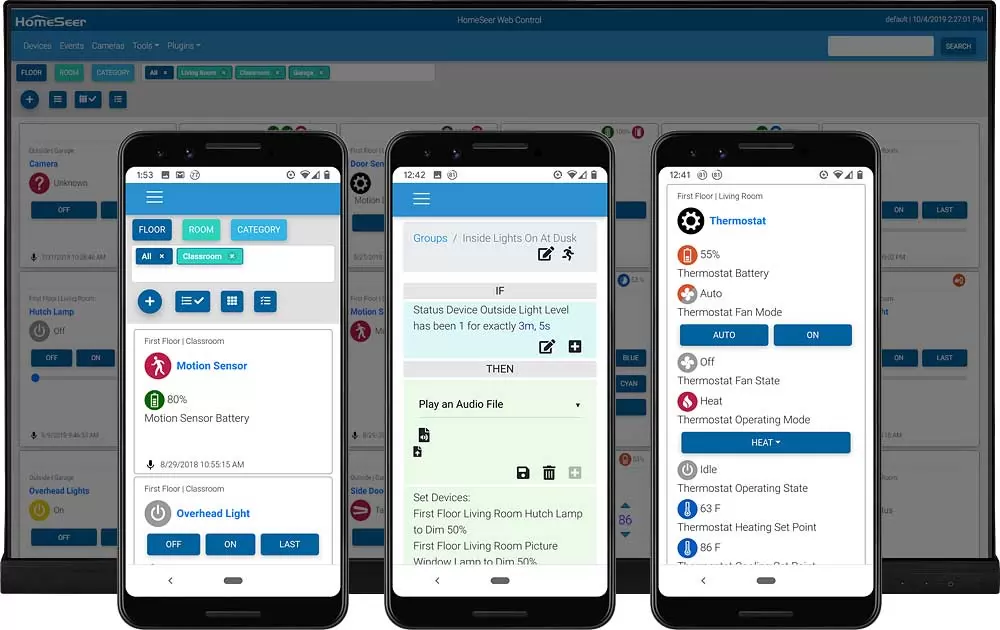
HomeSeer is a powerful home automation platform designed to manage Smart Home devices across different protocols, including Z-Wave, Zigbee, and Wi-Fi. One of the noteworthy features of HomeSeer is its ability to run your home automation locally, without relying on the cloud. This isn't only ideal for speed, security and data privacy, but it also gives you a boost in reliability—nobody wants their Smart Home to freeze if their internet connection is temporarily unavailable.
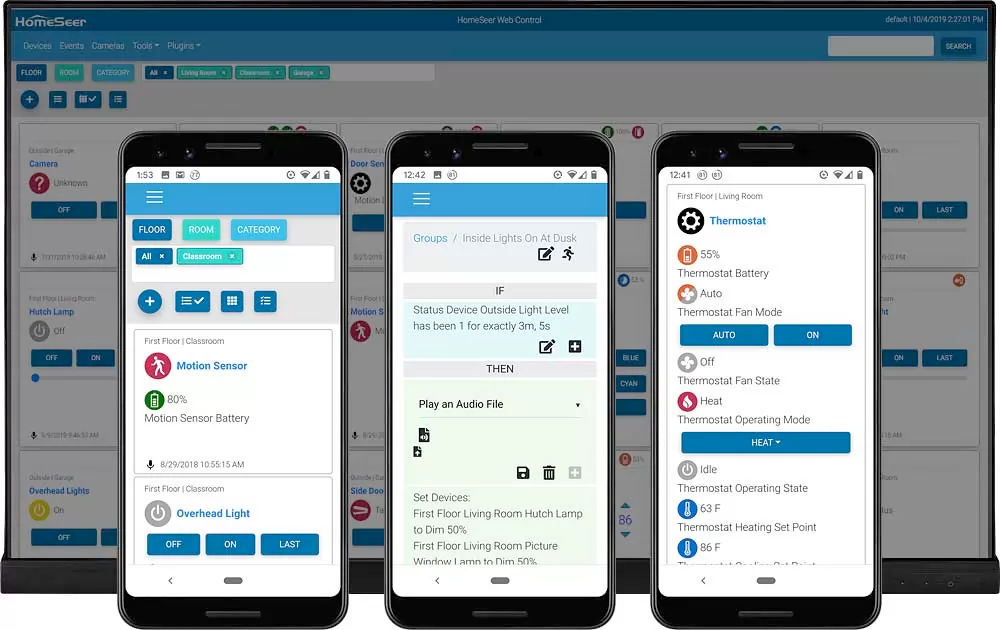
HomeSeer is also a friendly platform for power users and tinkerers. With support for scripting and plug-ins for extensibility. Plus, with a vibrant community of fellow enthusiasts, a quick search of the forums and you'll are likely to find inspiration for your next automation project.
If you are new to HomeSeer, I highly encourage you to read the following article to get familiar with its main features.
What You'll Need To Get Started
You will require a few components to build and run your HomeSeer hub. First, you will need the hardware where we are going to install and run HomeSeer:
Hub Hardware
- A Raspberry Pi module. HomeSeer makes available a pre-built Raspberry Pi hub, which you can buy directly on their site. However, I found that the included 1GB of RAM quickly becomes a limitation to what you can do with the system. I prefer and suggest using a more powerful module as the base of your HomeSeer build. I used instead the Raspberry Pi 4 4GB Starter Kit, which includes everything you need: a memory card and reader, a case with a fan, heat-sinks and a power supply. You can also get all these components individually if you have previous experience building Raspberry Pi modules.
- An Ethernet cable (optional). It is a good idea to have a network cable handy in case you need to connect the Raspberry Pi to your home network via Ethernet for troubleshooting. A short, 0.5FT Cat6 Ethernet Cable will be more than enough to get the job done but, you may want to get a longer cable if you plan to keep your Raspberry Pi module connected to your router all the time.
- A USB-A to USB-C adapter (optional). Most MicroSD card readers connect to your computer using a USB-A port. If your computer only has USB-C (i.e. most recent Macs and laptops) you will need a USB-C to USB-A Female Adapter.
HomeSeer Software
If you already own a license for HomeSeer and just want to move your installation to a Raspberry Pi hub, you can reuse your existing License ID and Password. Otherwise, you can choose either of the following:
- A 30-day trial HomeSeer license (recommended). You can get a trial license from their store. This license gives you full access to HomeSeer and its features. This way you can test the functionality of the software before committing to make a purchase.
- A Life-Time HomeSeer license. If you are already familiar with HomeSeer and prefer to purchase a full, life-time license, you can get it from their store. At the time of this writing, the price for the life-time license is $150US
Accessories For Device Integration
To integrate HomeSeer with devices that connect to the internet either directly or through a proprietary hub (like Lutron, Philips Hue, Ecobee, Nest, etc.) you only need to install the respective software plug-in in (we will cover that a bit later). To connect devices directly to HomeSeer, you will need either one (or both) of the following:
- A Z-Wave USB Stick (recommended). Z-Wave is a low-power wireless communication protocol designed for Smart Home devices. It operates on a separate frequency from Wi-Fi, reducing interference and ensuring reliable, energy-efficient connectivity for home automation. I recommend getting the Zooz 800 Long Range S2 Stick which provides extended coverage (they claim up to a mile range!).
- A Zigbee USB Stick (optional). Zigbee is a low-power, wireless communication protocol for Smart Home devices, similar to Z-Wave. While both enable reliable automation, Zigbee operates on the 2.4 GHz frequency, offering faster speeds and broader device compatibility. However, Z-Wave typically has a longer range and less interference due to its lower-frequency operation. Zigbee supports a larger mesh network, making it ideal for densely packed Smart Homes, whereas Z-Wave is often preferred for stability and reduced congestion. At home, I use the SONOFF 3.0 USB Dongle.
Since Z-Wave has been around for a while, you will find there is a wide range of devices available for this protocol. Zigbee has been catching up in number of supported devices. And there is also a more recent standard: Matter. It may be confusing to decide which protocol you should adopt for your home.
My recommendation: do not limit your choice of devices to a single standard. The advantage of using HomeSeer is having the ability to seamlessly combine devices that use different protocols into your Smart Home.
If you need ideas on what kind of devices you would like to control with HomeSeer, see a list of my favorite integrations:

Step by step: HomeSeer Hub Installation
The following section is an extended version of the HomeSeer HS4-Pi Install Guide. We will cover the steps of the original guide, with additional information on how to set up WiFi, remote access and more.
Step 1: Download the HomeSeer 4 Raspberry Pi image
I recommend using a 64-bit HomeSeer 4 image that I put together to use the 64-bit version of Raspberry Pi OS with a few additional upgrades, which I describe in detail in the article linked below:

If you prefer to use HomeSeer's default image, you can download it from here.
- Download the 64-bit HomeSeer 4 image. This file is about 1GB, so it will take more than a few minutes to download.
- The image comes in a
.img.xzextension that can be used directly with the Raspberry Pi Imager tool.
Step 2: Build Your Raspberry Module
Now is the time to put together all the pieces of your Raspberry Pi board. If you bought a kit like the Raspberry Pi 4 4GB Starter Kit, follow the instructions in the manual. However, do not insert the MicroSD into the Raspberry Pi, or turn it on just yet!
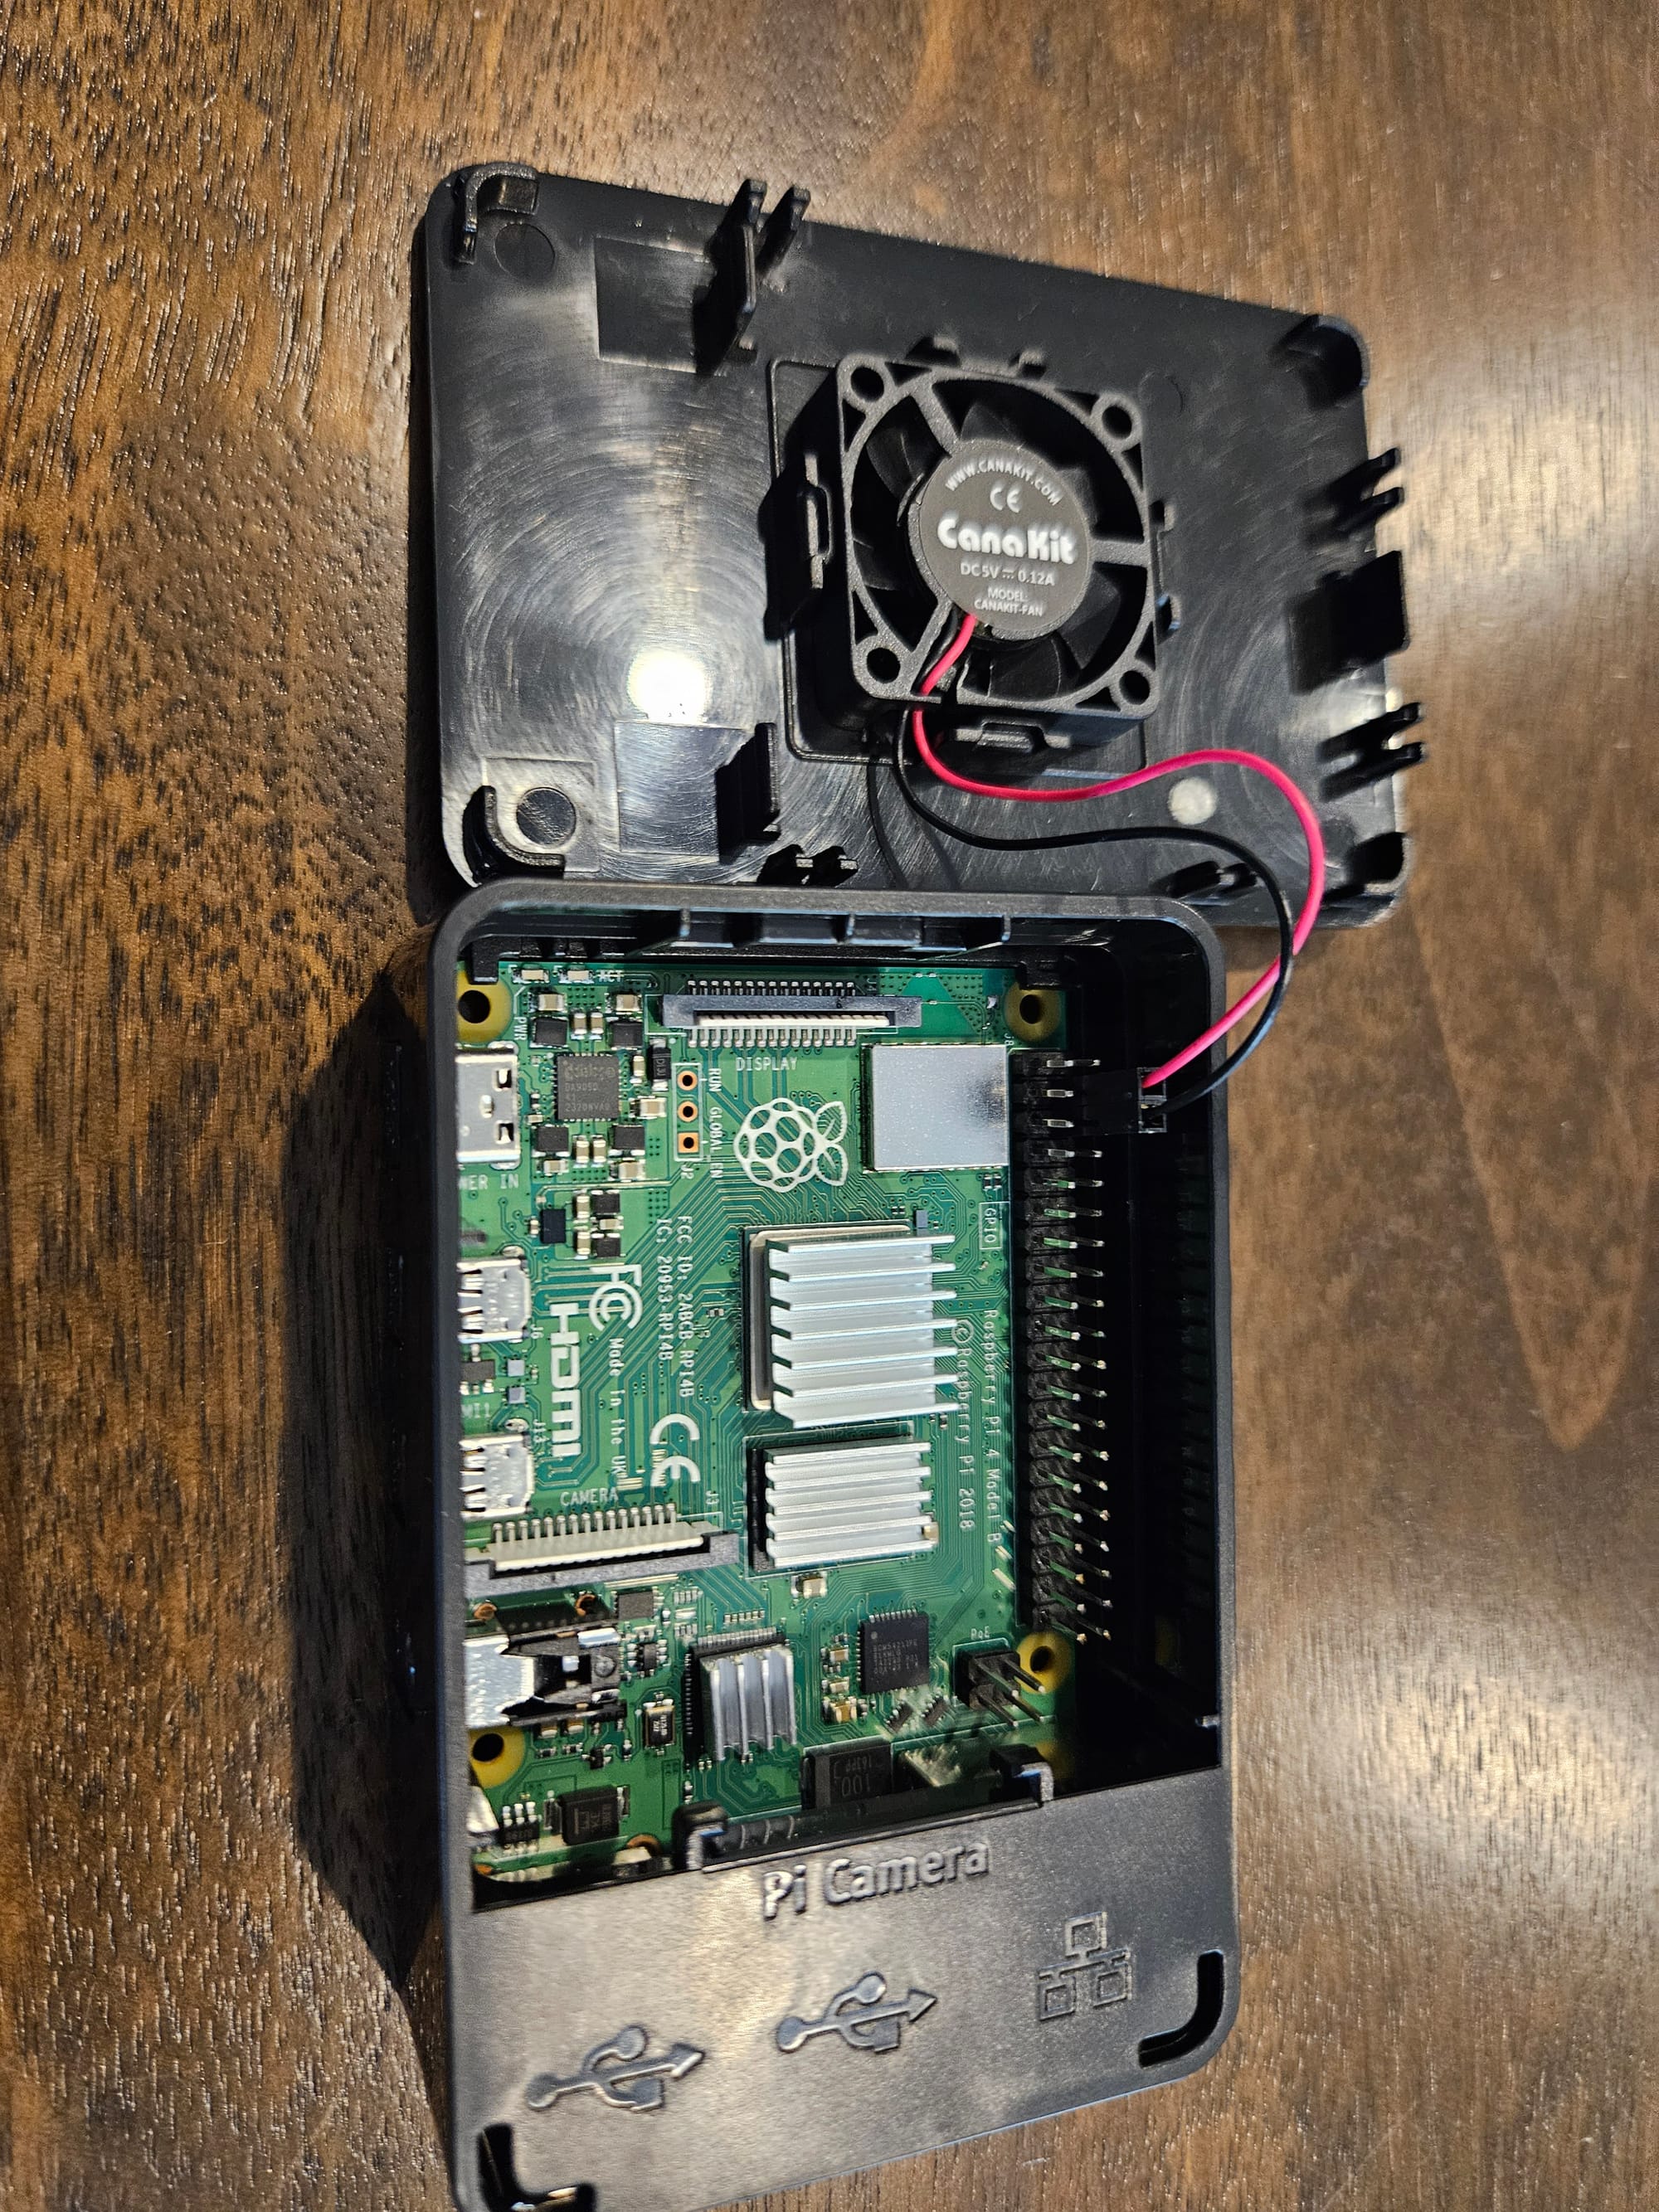

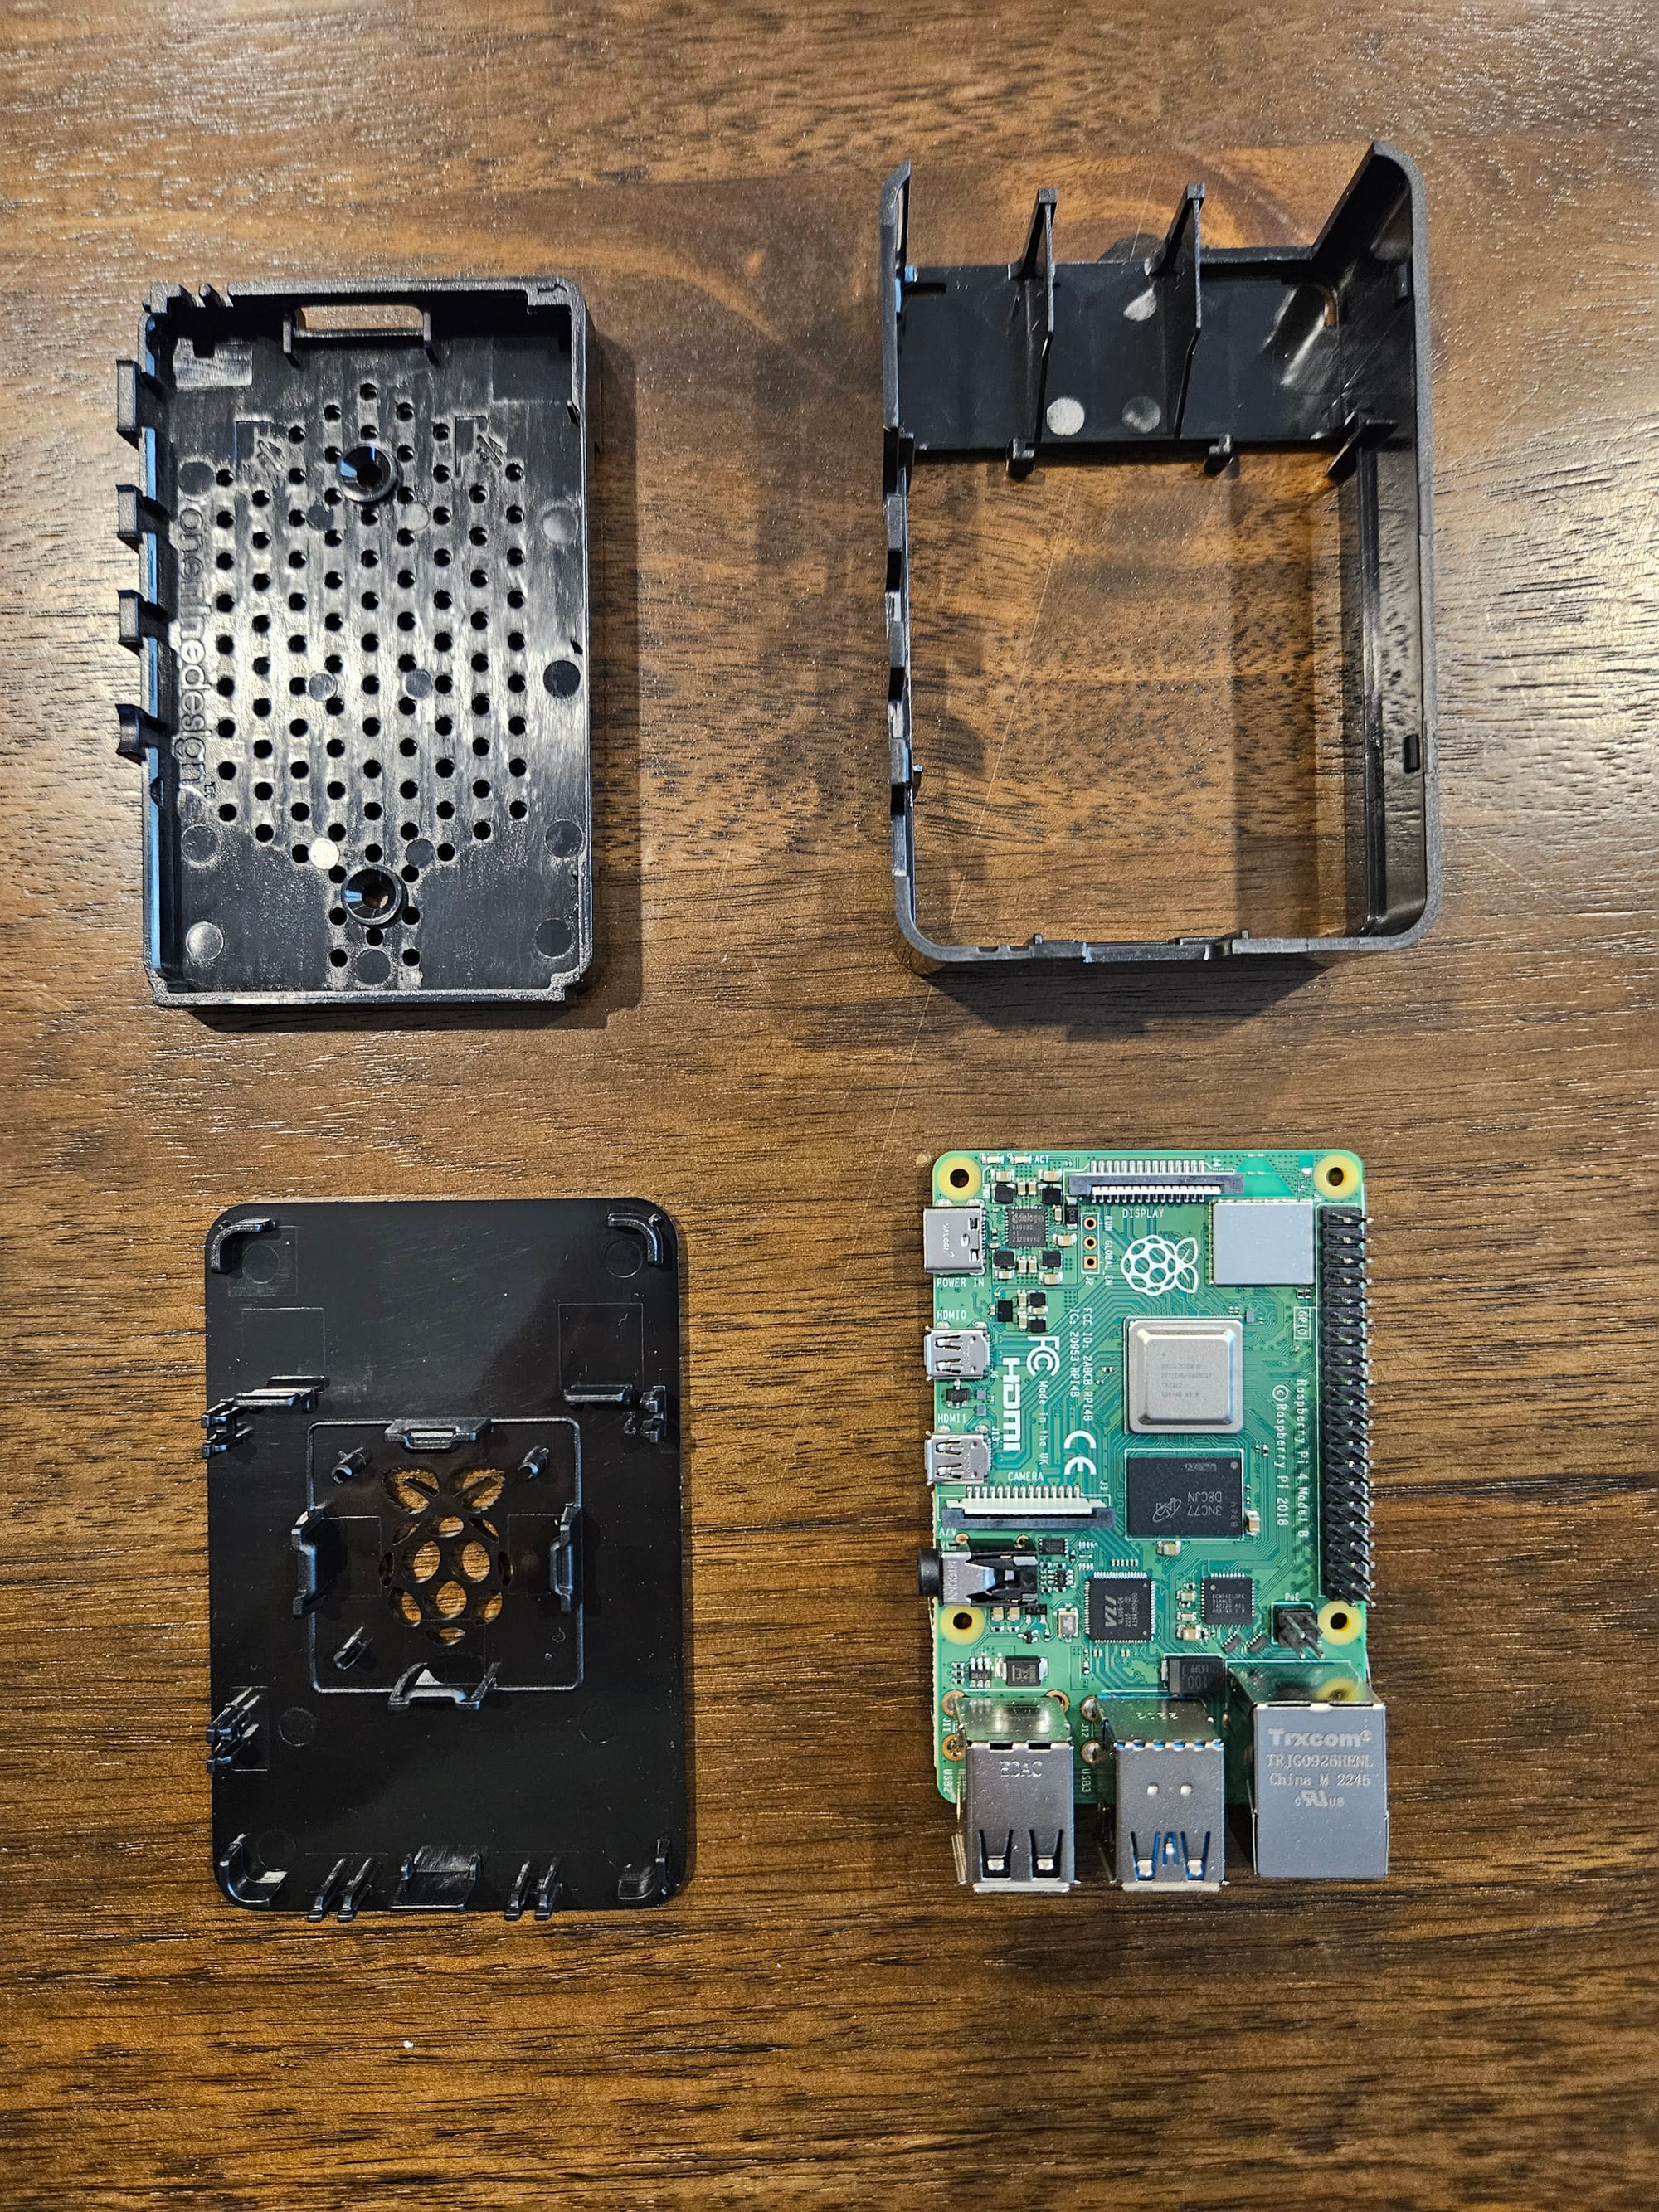
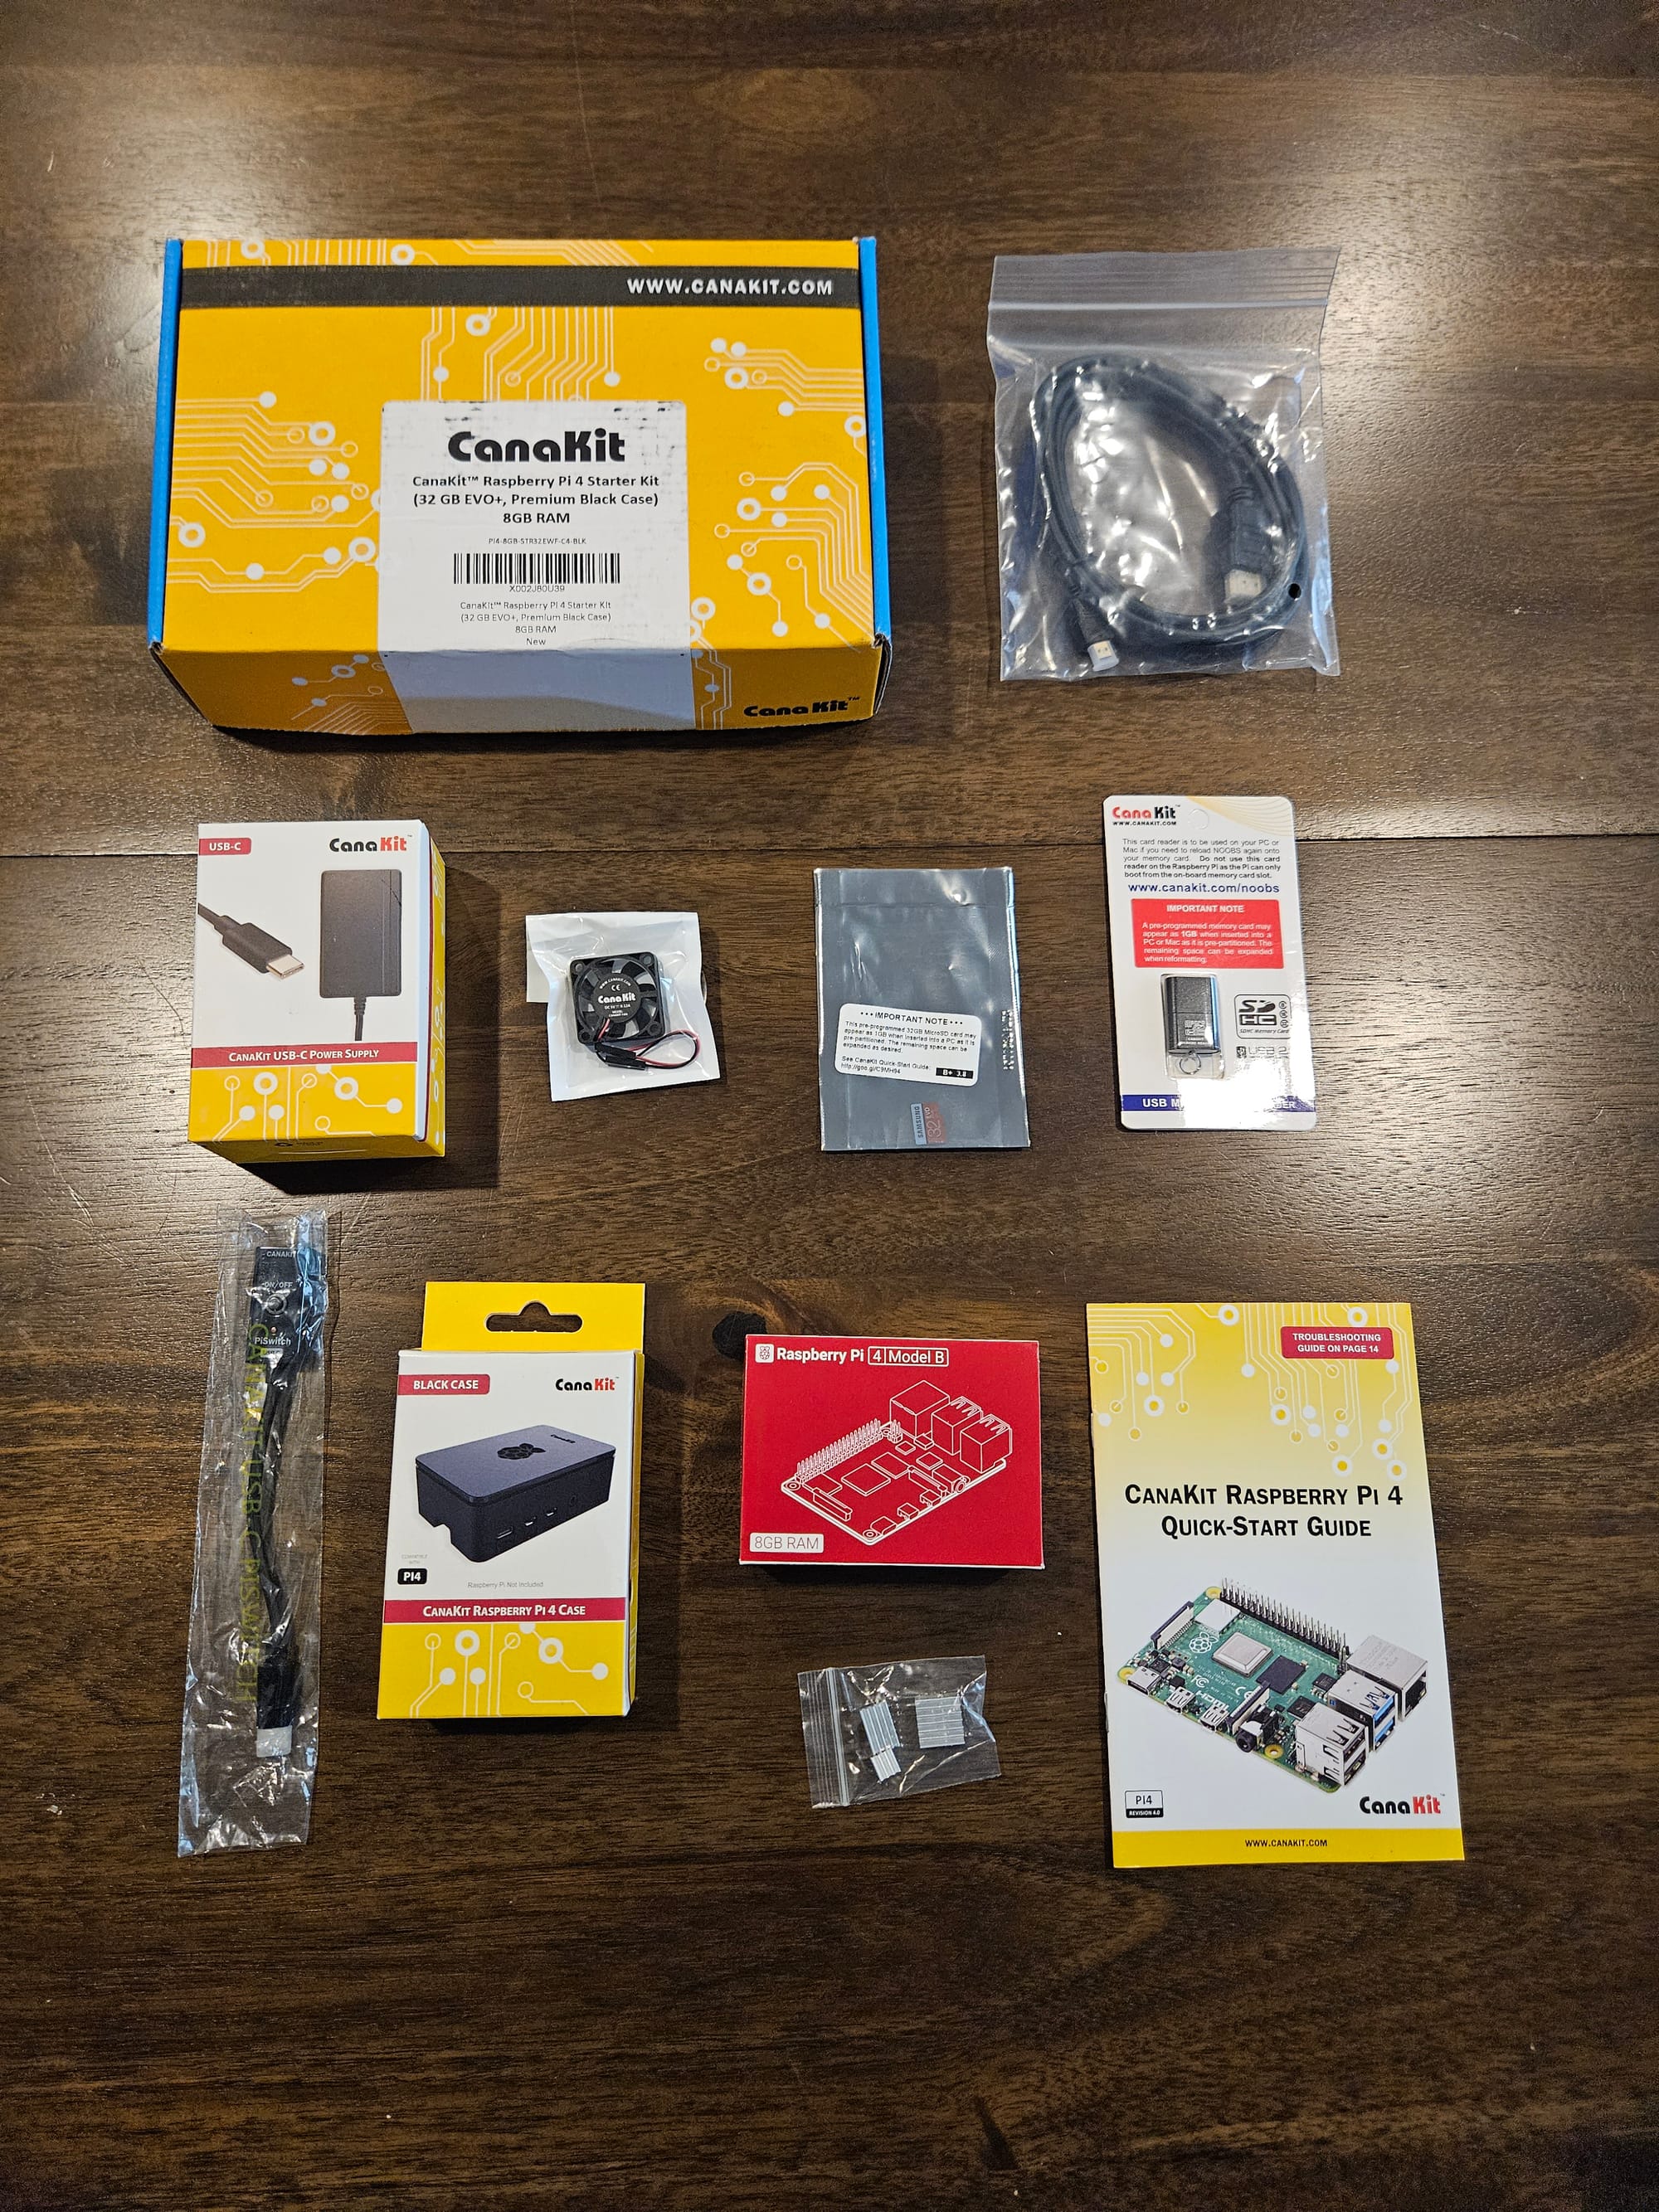
Putting Together The Raspberry Pi Module
Step 3: Prepare the MicroSD card
- To flash the Raspberry Pi MicroSD card with the HomeSeer 4 image, we are going to use the Raspberry Pi Imager tool. Go to their downloads page and get the version that matches your system. When the download finishes, install the program on your computer.
- Now, insert the MicroSD card into your computer. This will usually require using a MicroSD reader. If you purchased a kit like the Raspberry Pi 4 8GB Starter Kit then the MicroSD reader came included with it.
- Run the Raspberry Pi Imager program. Click on Choose OS and select the option Use Custom at the bottom of the list. Then use the
.img.xzfile you downloaded earlier.
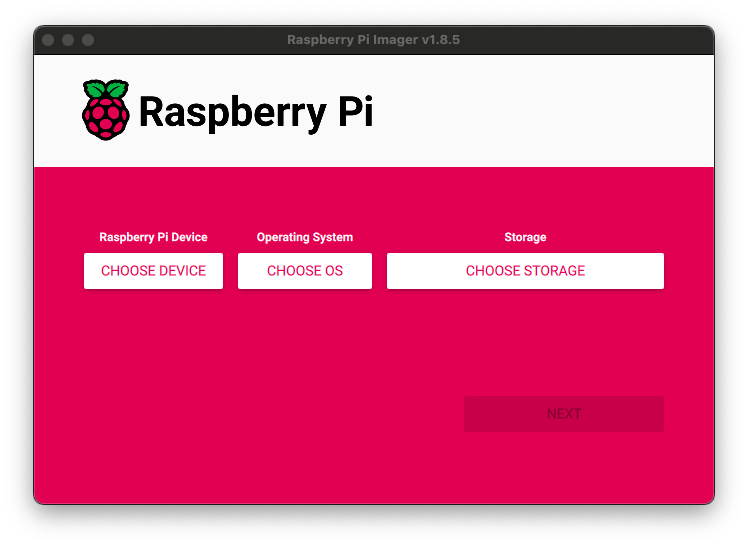
- Then click on Choose Storage and choose the drive that corresponds to your MicroSD card. Then click Next.
- When asked if you want to Use OS Customization click on Edit Settings
- If you are planning to connect to your network via WiFi, enable Configure wireless LAN and enter your WiFi connection settings. Make sure to select the appropriate Wireless LAN country or the radio frequency for your router may not be enabled on the Raspberry Pi after it boots.

- Finally, remove the MicroSD card from your computer and insert it into the Raspberry Pi.
Step 4: Register your Hub with HomeSeer
- Plug your Raspberry Pi hub to your router using an Ethernet cable. Then, power on the Raspberry Pi using its power supply.
- It will take a couple minutes for the Raspberry Pi to go through its first boot. At this time, the OS will auto-expand the storage system to occupy the full size of your Micro SD.
- From another computer that is connected to the same network, open a web browser and navigate to https://find.homeseer.com. You will see a list of HomeSeer hubs that are visible. Select the one called HS4RPi:
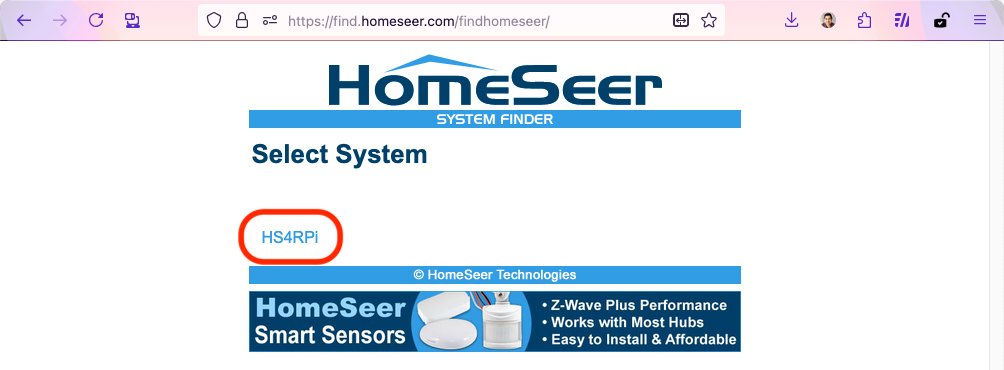
Another way to find your Raspberry Pi from your browser is to navigate to the address http://hs4rpi.local
- You should be presented with the registration page. In this form you will enter your License ID and Password (either the 30-day trial or full license).
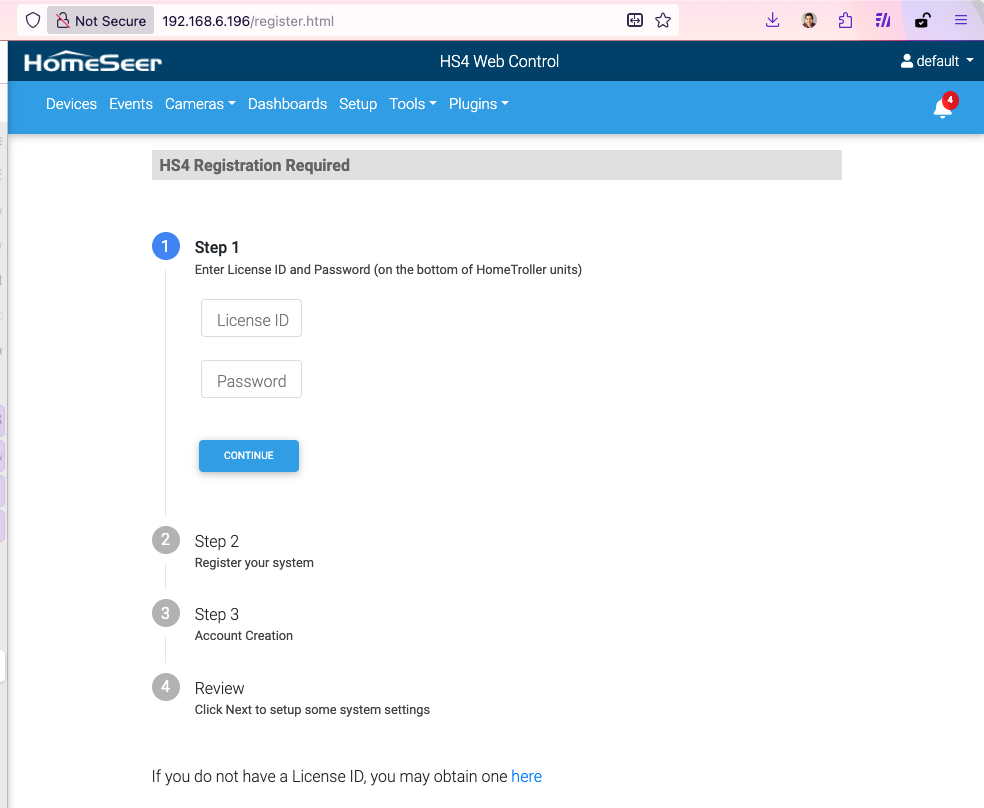
- You will also be given the option to sign-up for a free MyHomeSeer account. This will give you the ability to access your hub remotely. But, you will need to upgrade to a paid subscription to integrate your hub with cloud assistants like Alexa/Google
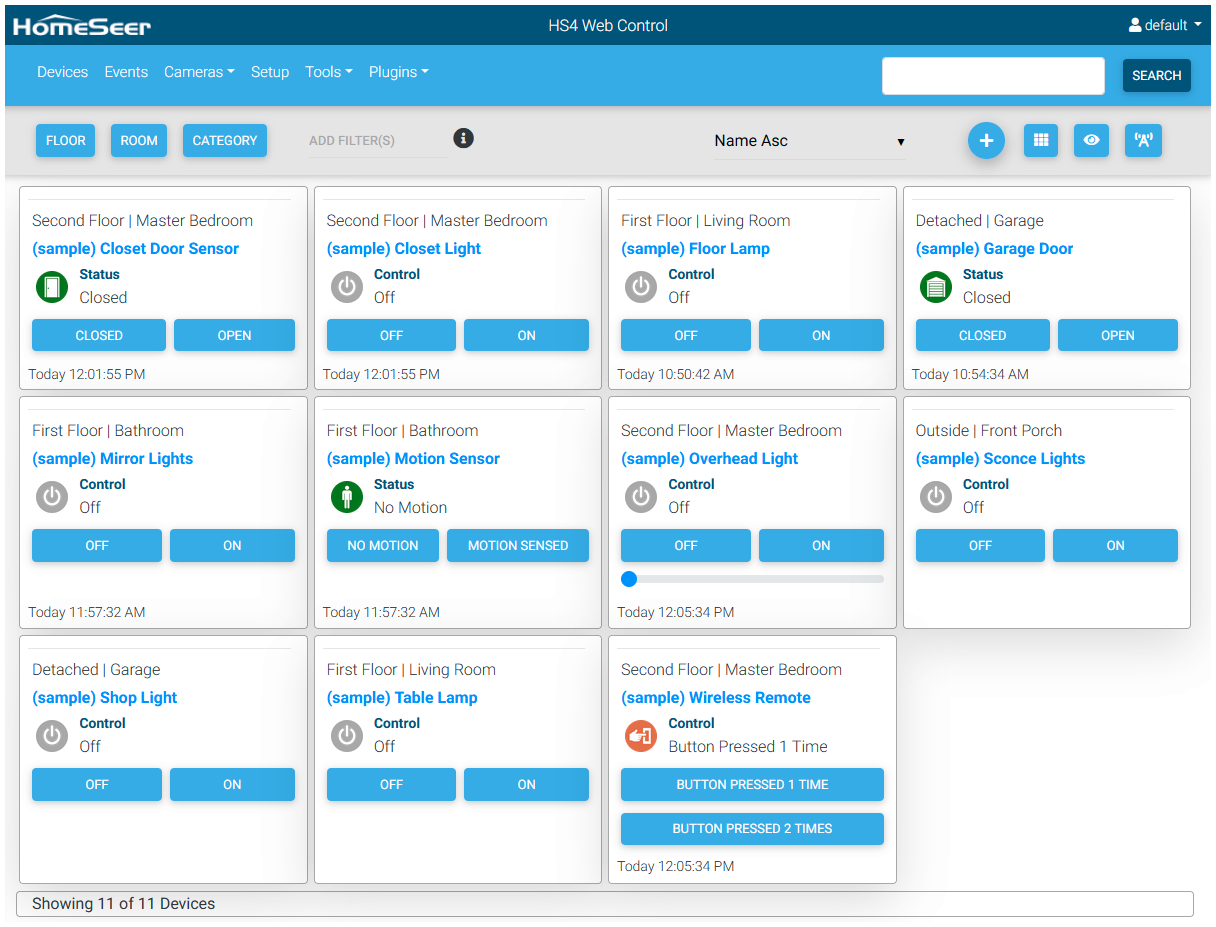
Normally, a clean installation of HomeSeer will end with a set of test (virtual) devices and events pre-configured. These are only meant for giving you an idea of what it looks and feels to use the software. It is safe to delete these devices and events once you've gotten the hang of it.
Step 5: Change password for root (recommended)
The HomeSeer image we installed on the Raspberry Pi comes configured with the following usernames and passwords:
| Username | Password |
|---|---|
| root | homeseerpi |
| homeseer | hsthsths4 |
For security reasons, I recommend changing the password for root. Use a strong password and keep it in a safe place (ideally a password manager, such as 1Password).
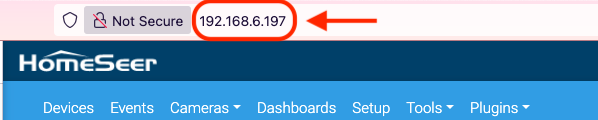
- While you're still on your hub's Web interface, write down its IP address from the browser address field.
- From a terminal window on your current PC or laptop, SSH into your Raspberry Pi as root. When asked, enter the password
homeseerpi:
ssh root@<your_hub_ip>- Once you are logged in, use enter the command
passwdto change the password:
root@HS4RPi:~# passwd
New password:
Retype new password:
passwd: password updated successfully
Step 6: Enable WiFi (optional)
If you configured your WiFi settings using the Raspberry Pi Imager, or you do not need a WiFi connection, you can skip this section
We can enable the WiFi and connect to your wireless router. This would let you, for example, move the hub to a different place in your home that may not have convenient access to wired Ethernet.
- If you disconnected from the Raspberry Pi, log back in using SSH. Use the password for root that you set in the last step.
ssh root@<your_hub_ip>- Once you are logged into the Raspberry Pi, enter the following command, replacing
myssidandmypassphrasewith your WiFi name and password, respectively:
raspi-config nonint do_wifi_ssid_passphrase myssid mypassphrase- You can check if the WiFi connected successfully by running the following command
ifconfig wlan0. The output will show you the new IP address assigned to the WiFi adapter:
wlan0: flags=4163<UP,BROADCAST,RUNNING,MULTICAST>  mtu 1500
        inet 192.168.6.197  netmask 255.255.252.0  broadcast 192.168.7.255
        inet6 2601:600:a400:abe4:4075:71c9:b65a:486b  prefixlen 64  scopeid 0x0<global>
        inet6 fda1:6b11:b259:1:83b0:9f4b:e13c:ca31  prefixlen 64  scopeid 0x0<global>
        inet6 fe80::8868:ffa9:9eca:f4a9  prefixlen 64  scopeid 0x20<link>
        ether d8:3a:dd:6d:cf:c5  txqueuelen 1000  (Ethernet)
        RX packets 140  bytes 27057 (26.4 KiB)
        RX errors 0  dropped 4  overruns 0  frame 0
        TX packets 50  bytes 9136 (8.9 KiB)
        TX errors 0  dropped 0 overruns 0  carrier 0  collisions 0
Now that your Raspberry Pi is connected to the WiFi, you can unplug it from the Ethernet cable.
If you need to find our Raspberry Pi address in the future you can get it again by opening https://find.homeseer.com from another computer on the same network.
Step 7: Assign a static IP to your hub (recommended)
Most home routers have the option to assign a static IP to any arbitrary device that is connected (either via Ethernet or WiFi). The specific procedure depends on the brand and model of your router. I recommend you do this so the IP of your hub does not change over time. This will make it possible to build additional solutions (like remote monitoring) which require having a stable IP address.
What's Next?
You should by now have a working Smart Home hub, running HomeSeer 4, on your Raspberry Pi. There are many things you can do next with your new hub:
- Familiarize yourself with the basics of HomeSeer, if you are new to the ecosystem. Check out the article Getting Started With HomeSeer.
- Want inspiration on new devices and automation for your home? Check out My Favorite HomeSeer Integrations.
- Make your server securely accessible via the internet, using your own custom domain (e.g.
homeseer.mydomain.com). See the article Direct Access for HomeSeer for a quick guide.
Also, stay tuned for some upcoming articles that will give you additional tools to make the most out of your HomeSeer installation, such as:
- Install and configure the Z-Wave and Zigbee plug-ins to connect to supported devices with HomeSeer.
- Keep tabs on your Raspberry Pi performance remotely without consuming too many resources on your Pi module.
- Add monitoring dashboards and alerts based on your devices connected to HomeSeer using Prometheus and Grafana.