Simple Container Management With Portainer
Managing Docker containers can be complex, but Portainer simplifies it with a user-friendly UI. Learn how to deploy, monitor, and manage containers effortlessly.

Managing containers efficiently can be a daunting task, especially for those new to Docker. While the command line provides full control, it often comes with a steep learning curve and complexity. This is where Portainer steps in—offering a clean, intuitive interface that simplifies container orchestration and management, making it accessible to both beginners and experienced developers.
Portainer provides a graphical UI for managing Docker, Kubernetes, and other containerized environments, eliminating the need for complex CLI commands. Portainer streamlines daily operations like deploying containers, monitoring resource usage, applying updates to your applications, and managing networks and volumes—all from a central dashboard.
One of the standout features of Portainer is its App Templates, which allow users to quickly deploy bundled, pre-configured applications and services with minimal setup. That is why, going forward, we will be deploying our applications using templates, from our own template repository.
If you’re looking for a way to simplify container orchestration while maintaining control and efficiency, Portainer might be the tool you’ve been searching for. Let’s dive in!
What We Need Before Getting Started
We are going to use Portainer to manage our Docker containers, but setting up Docker on our server is a separate process. Also, since we are going to deploy Portainer itself as a Docker container, we need to set up Docker first. If you have not done so, make sure to read and follow the steps from this guide:
Setting up Portainer
These steps will guide you through the process of getting Portainer up and running on your server.
Step 1. Install The Service Using Docker
The following steps assume you have followed the guide linked earlier, and you have set your application data directory at /srv/appdata/. Make sure to adapt the steps below if using a different configuration.Open a terminal window on the Linux server where you want to install Portainer, and enter the following command:
PORTAINER_WEB=9000    # Change to choose a different localhost port
APP_DATA=/srv/appdata # Change to use a different application data root

docker run -d \
  -p ${PORTAINER_WEB}:9000 \
  --name portainer \
  --restart=always \
  -v /var/run/docker.sock:/var/run/docker.sock \
  -v ${APP_DATA}/portainer:/data \
  portainer/portainer-ce:latest
Let's review the important details of the command above:
docker run -dis telling Docker to start and keep the container running on the background (i.e. detached)-p ${PORTAINER_WEB}:9000is mapping Portainer's HTTP endpoint (9000) to the port where we want to access it on the local host. If your system already a service listening on port 9000, you can change the value ofPORTAINER_WEBto a different port number.--restart=alwaystells Docker to restart the container if it stops, and across system reboots-v /var/run/docker.sock:/var/run/docker.sockallows Portainer to communicate with the Docker daemon, to manage containers
Now you can access the web console for Portainer. If your server has a desktop environment, you can open a browser and navigate to http://localhost:9000 or whatever port you set in PORTAINER_WEB earlier. If your server is headless, you can access it from another machine on the same network at http://<your_server_ip>:9000
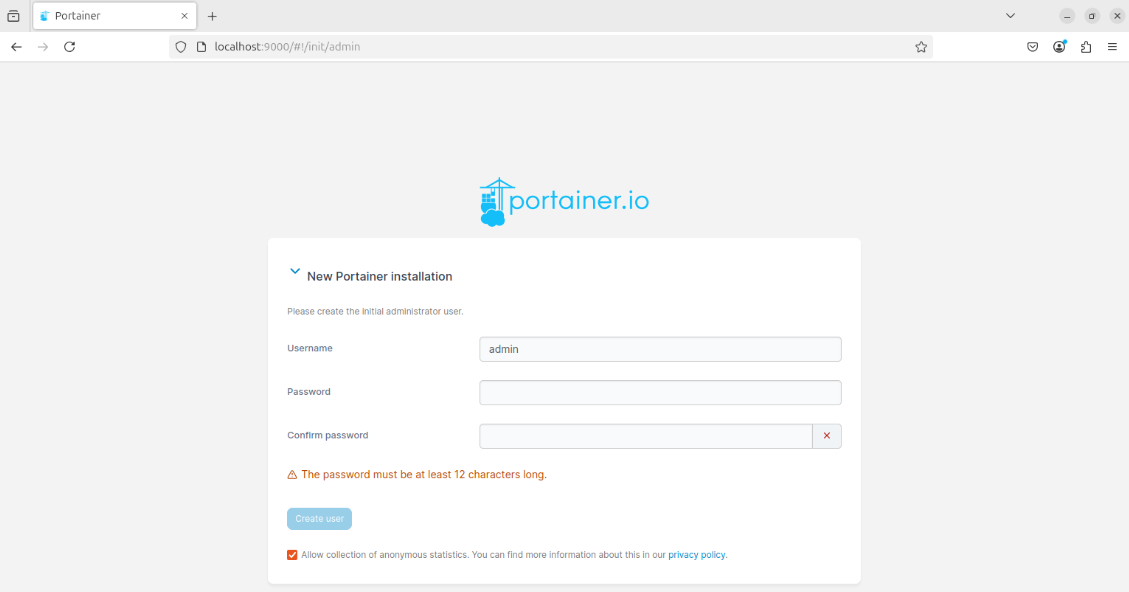
Step 2. Set Up Your Administrator Account
The first time you access the web console, you will be asked to set a username and password for Portainer. Make sure to use a strong password and write it down somewhere safe (ideally a password manager, such as 1Password)
In the screen that follows you are given the option to connect your Portainer installation with additional environments. Since we are going to be managing Docker on the local host (at least, for now), go ahead and choose Get Started.
Step 3. Change The App Template Location (Optional)
Portainer app templates are pre-configured settings for deploying containers or stacks of containers. You can use these templates to streamline the deployment of applications and services.
I've created a public repository of app templates that you can use to quickly install the applications described in various articles hosted on this site. To use it, configure Portainer using the following steps.
- On the Portainer web portal, access the General Settings panel
- Under App Templates, set the following URL value:
https://thedebuggedlife.github.io/portainer-templates/templates.json - Click on Save application settings
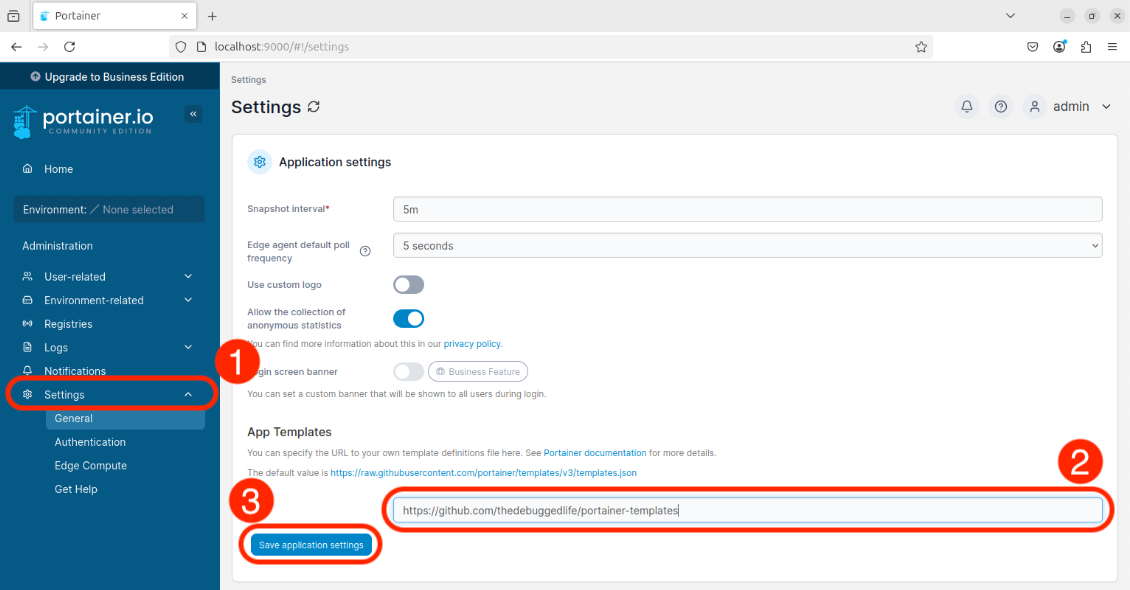
If you later want to install a template from Portainer's original template collection, simply go back to General Settings and delete the URL from App Templates.
Step 4. Start Deploying Applications With Portainer! 🚀
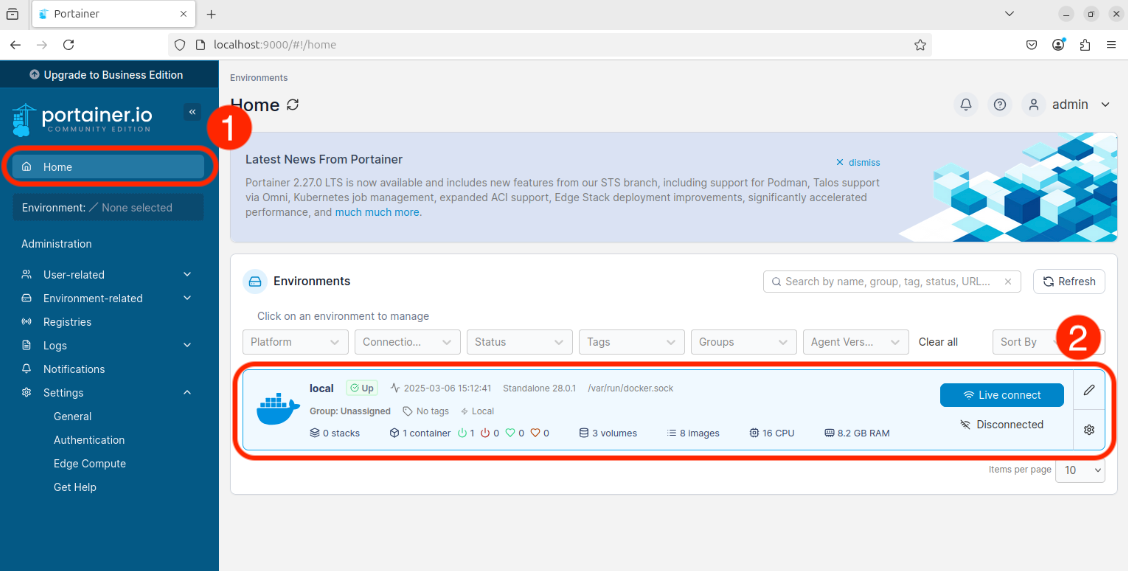
You are now ready to begin deploying applications using Portainer. In order to do this, you need to first choose the Environment where you want to perform a deployment. In our case, that is the same server where Portainer is installed, i.e. the local environment.
Go ahead and select the local environment from your Home panel:
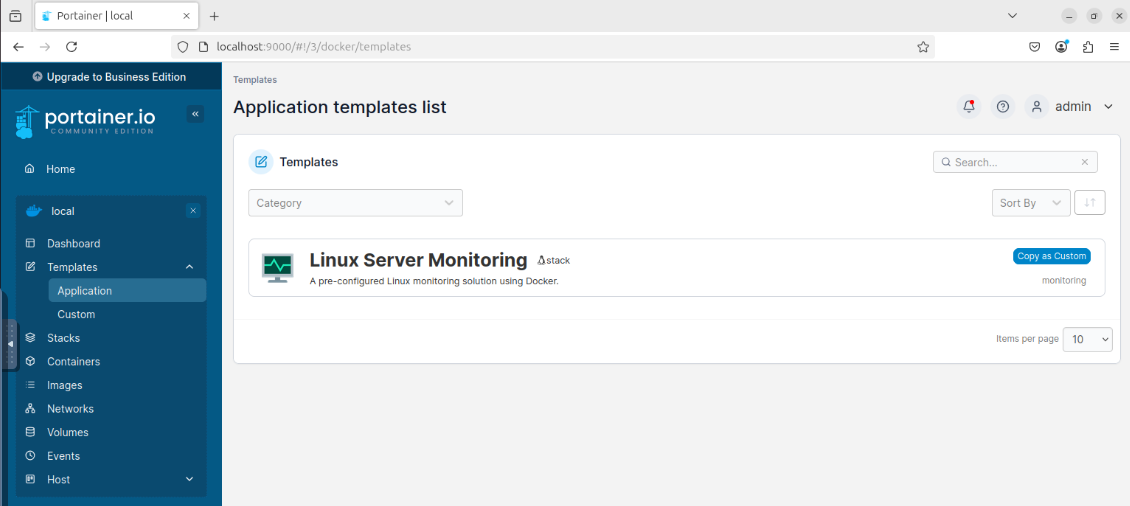
From the side menu, you can now install a new application using either:
- An application template. Here you can install applications using templates defined in a repository. If you followed Step 3 earlier, you should see in this section the different templates related to other articles on this site.
- A Docker Compose stack. Using this option you can either enter the contents of a
docker-compose.ymlfile manually, upload one using your browser, or point to an existing Compose file on a GitHub repository. - A single Docker container. With this option you can quickly setup a new container by entering the image you want to deploy. You can configure network port mappings, volumes, environment variables or labels.
What's Next?
You are now ready to begin deploying Docker containers with the convenience of Portainer's web based management UI. In various articles across this site, you will find instructions on which templates you should install and how to configure them properly.
A few other things that you can do with your new Portainer deployment:
- Manage Docker containers in multiple servers. If you have a home-lab with more than one server, you can use a single Portainer instance to manage deployments across all of them using the Portainer Agent.
- Put Portainer behind a reverse proxy. If you already host another web service, or want to host multiple additional services alongside Portainer, you can setup a reverse proxy like Traefik.